
Wednesday
A friends Gallery Wall
I did this gallery wall for a friend of mine who just didn't know where to start. She is a hair dresser and her husband is a builder/flipper, hence the framed hammer and scissors. We also framed their 'song' and I used an app called waterlogue to make a 'watercolor' out of their first home.

Sunday
My $99 bathroom update

Our house had no shortage of honey-oak cabinetry when we bought it, but room by room, I'm remedying this problem! We'd love to eventually do a complete remodel of our master bath, but in the meantime, I had to do something about this situation:

Here's the cost break down:
1 quart of Behr satin paint in Night Club $16
Foam composite baseboard $15
Cabinet Hardware $42
New rug from Home Goods $24
Ladder back chair w/rush seat $2 garage sale
Zinsser primer - previously owned
For a grand total of $99!

I didn't spare a minute to take a picture before I covered these babies up with some pretty dark gray/navy paint. I used one coat of primer, 2 coats of Behr paint/primer combo and 1 coat of poly. I rolled everything on with a sponge roller in the shower - easiest clean up around!

The base we bought is a foam-composite material so that when water made its way on the mirror and slid down as it often does on my husbands side, the trim wouldn't warp. A super dumb trick when painting trim is to use cans of food to prop the trim up.

Looks better already! We used Liquid Nails and some painters tape to prop these babies up.

How'd I forgot that ugly 90's clock? Oh well. I painted that little ombre chair using paint samples I had on hand. So, while I'd love to change out the tile, shower, tub, cultured marble counters, lighting, faucets, (!!!!) this is great for now!


Monday
Purple

Friday
Wall O' frames
I'm getting a bit bored of the 'picture wall' with the standard black frame in various sizes that everyone seems to have. I fell in love when the RH catalouge (actually, it's more of a book...how much does it cost them to print that baby?) arrived and I turned to the picture below. I love how it looks like the art was added overtime, slowly.
The look (from Restoration Hardware) I was going for:

The look I got:

Rather than sketches, I wanted art that was more personal to our family: temples from the cities we've lived in. I like how it turned out!
Wednesday
Kitchen Remodel (on a budget!)...before and after!
 |
| Here she is! Our (almost) completed kitchen! |
 |
| BEFORE: We must have looked at 40+ houses before we settled on this one. I don't understand the fascination with honey oak cabinetry Texas builders have. New homes, old homes, middle aged homes, all with oak cabinetry. I understand it's a solid, hard wood, but does it need to be stained honey color? Our homes in WA and Chicago had maple cabs and they held up quite nice, thank you. Anyway, it was super dark, closed off from the rest of the main level, and had a Tuscany vibe going on, my least favorite style. We considered doing much of the work ourselves, but decided against it after pricing out. |
 |
The cabs ahead are the ones we had removed to open up the wall. |
 |
| One bonus: under and over cabinet lighting! |
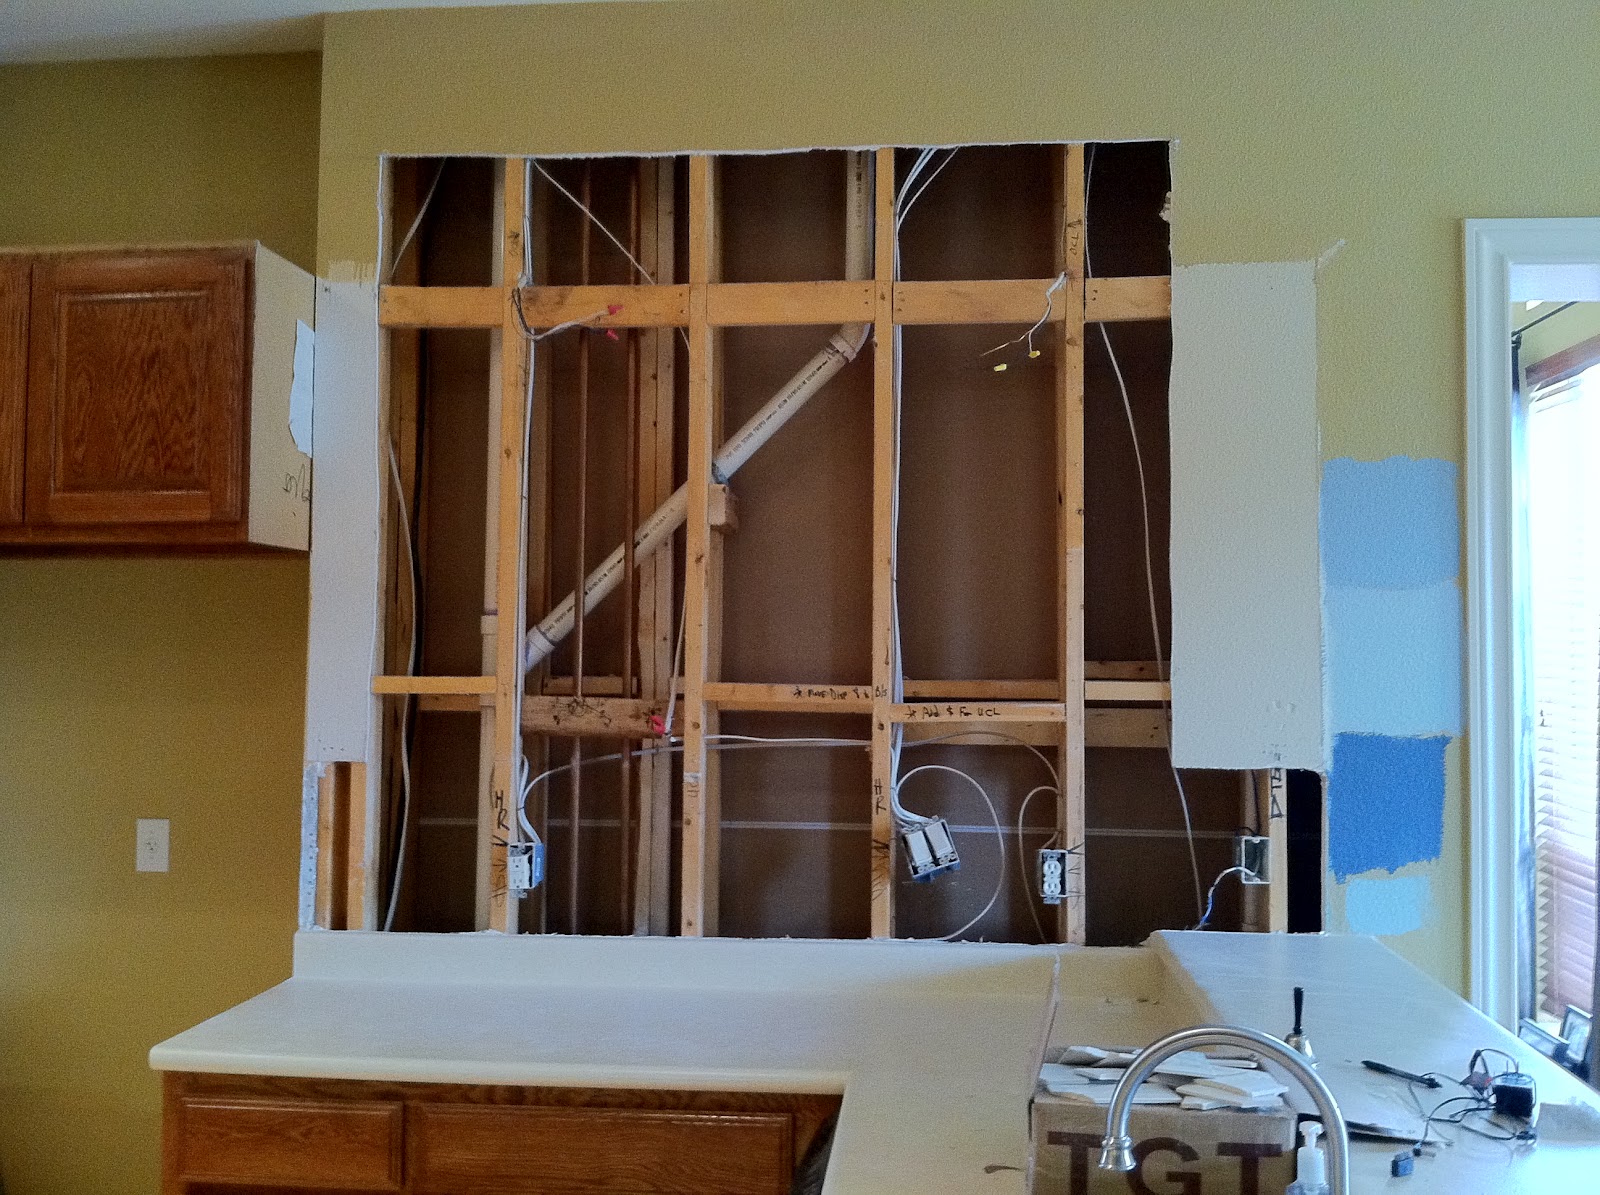 |
And the demo begins! This awesome plumbing pipe you see was a surprise to the contractor. It was a surprise to my checkbook as well, and forced us to stick with carpet (vs. hardwood) in our master bedroom. #firstworldproblems! I tried a ton of different blue/grays before I decided on a paint color and in the end, I combined all 11 sample size Bher containers, added white to it and made the paint color for my dining room! |
 |
Plumbing pipe disaster fixed. Pipes were moved over to the 12" wall to the right at the bargain price of $1,300. Man I wish I had plumbing skills. |
 |
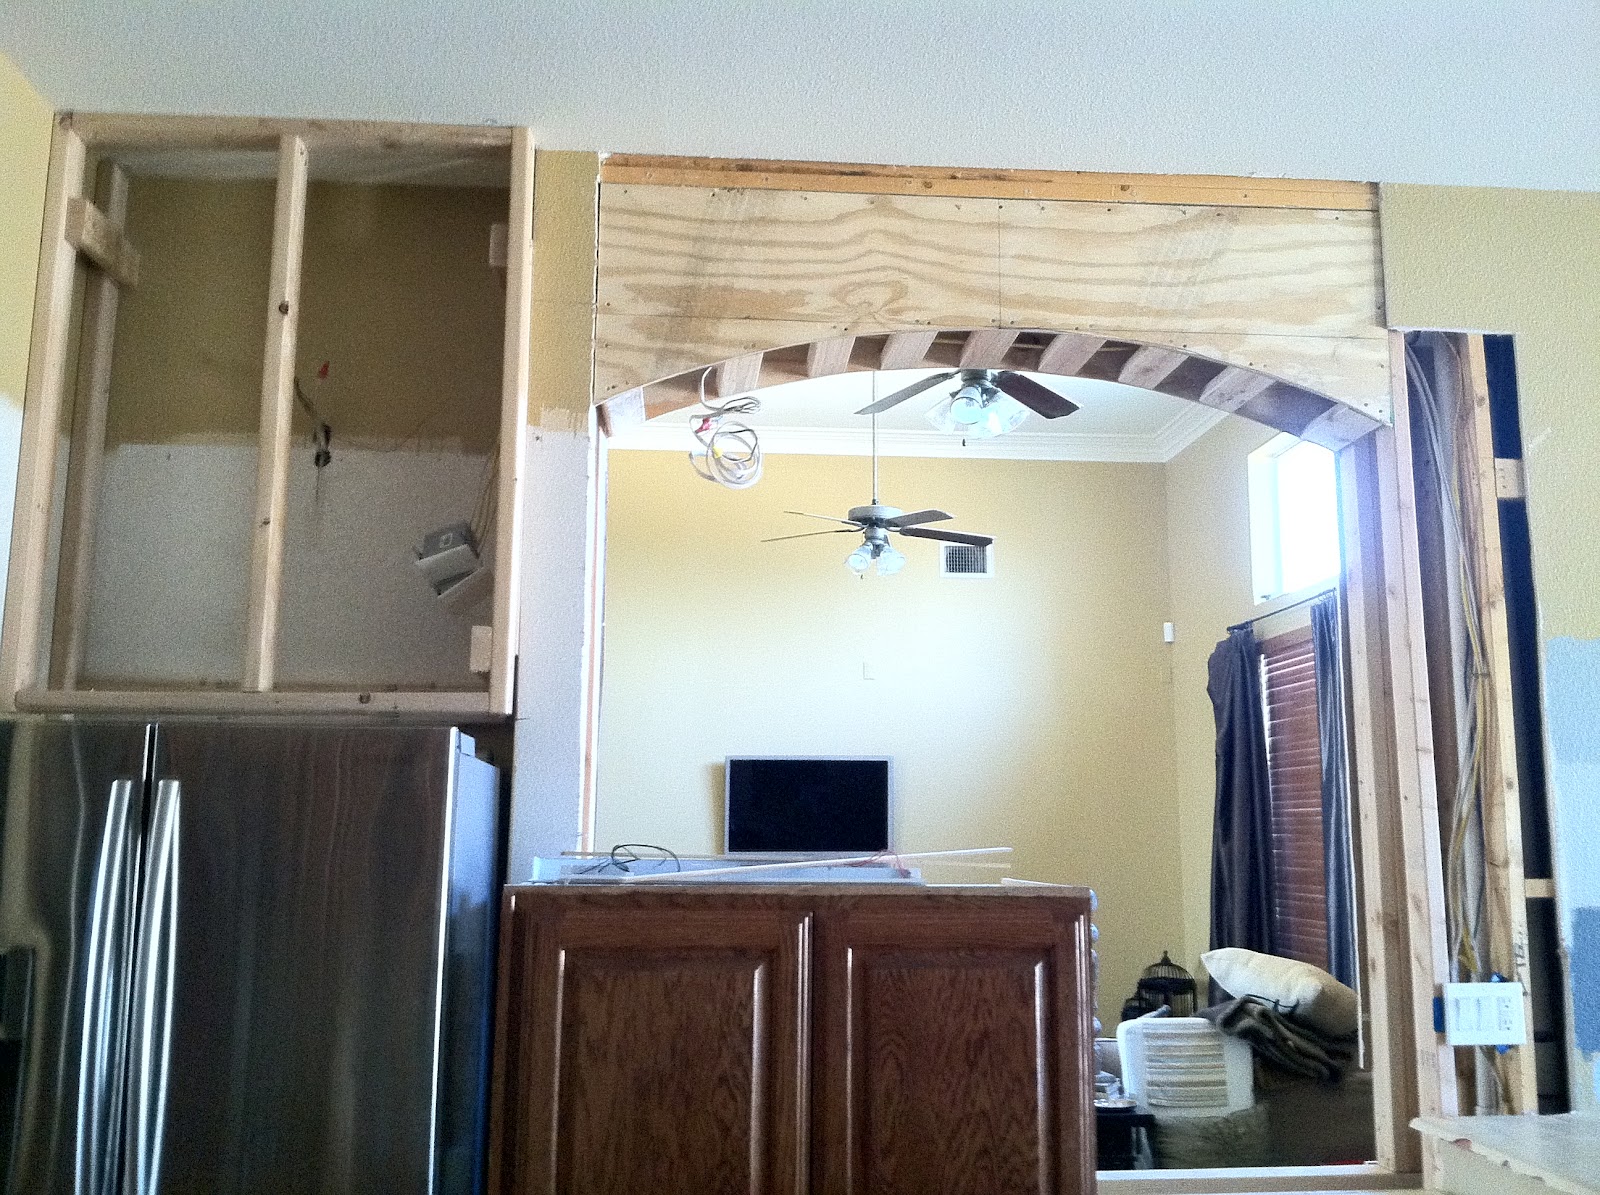
Framing in of the arch above. I wanted the refrigerator to be flush with the upper cabinets (to appear 'built-in') which required our contractor to build a frame about 6" off the wall to mount the cabs to. They accidentally covered up the electrical outlet for the lighting above and had to re-do the sheet rock. That totally would have been something we would have done, and so again, I'm so happy we hired this out. |
 |
Almost done!! The first slab of my coveted carrera marble is here! I actually had to sign a waiver from the granite/marble co. stating that I understand this marble will scratch, stain and do everything else a counter top shouldn't do. But I don't care, it's adds character. They've been using this stuff for hundreds of years in Europe and that's good enough for me. |
|
And again, after!
|
 |
| This spot was originally home to the TV (I remember when growing up thinking my friend who had a TV in her kitchen was SO rich!). I used thin piece of plywood and horizontally and vertically a thicker piece to make the shelf look more substantial. |

I made this cute pelmut box following the tutorial on the greatest blog I read, Little Green Notebook, except I used plywood because mine was longer, and heavier than what foam core would support.
 |
| I saw similar lights/lanterns at PB for $340, but found these babies for $149 at Overstock. I suspect the quality isn't as great as the ones at PB, but they do the job and only get touched when it's time to clean them. I bought the sink and bridge faucet (love) at Overstock as well, and am super happy with the quality/price. |

This corner is super cozy and the queen anne chairs have become a hot commodity. I bought them off CL when we lived in Chicago and had slipcovers made.

Perfect spot for my goodwill antique silver collection. My sweet neighbor in Chicago once brought me some kind of polish that she swore would 'restore the silver to what it once was'. I didn't have the heart to tell her I prefer the 'old' look to the 'new'!

Vinyl equivalent measures - still used weekly! We went with a 'pillow-edge' subway tile to mix things up a bit. I love the look and you can't beat the price! The hardware pulls are from Loew's and the bin pulls from the Pottery Barn Outlet.


The secretary desk was another CL find. It was once dark brown with fake gold/tan specks until I stripped it with a citrus stripper and 6 hours of hard labor. It's the perfect size for this spot and holds dining room linens and serving pieces.

I couldn't believe the price of corbels (like $100-$200 bucks) and although they would have been a tad bit prettier, couldn't work it into the budget. I picked these guys up at HD for less than $10 and added a piece of craft wood sold at Hobby Lobby with glue.
Glitter art canvas
While watching our (use to be) favorite design show, 9 by design, Rylee and I saw this killer glitter art that the Novagratz's used in a NY high rise. Ry has a large bare wall in her room and we knew we could recreate this with a large canvas and some vinyl.
Inspiration:


Laney got in on the action too. I didn't realize until later, but she purposely did the 'I' white so it would kinda read 'I shine'! Clever girl!

Finished product in Rylee's room:

Saturday
Board and Batten
Like most dining rooms, ours is visible as soon as you enter our house and said of us living here, "we are very boring people, come on in." We had spent all of our fortunes on the kitchen so I knew I'd have to find some way to add interest to the room on my own. Enter in: board and batten. I followed the awesome tutorial on a favorite blog, Centsational Girl, and am fairly happy with the results. I went blog hopping and read a few different tutorials about this project, and am seriously so thankful for all teh help/inspiration I get from others sharing their skills. I did find that most lucky people had the lovely smooth texture we had in Chicago (the kind I would now kill for) but for some reason, Texans love their thick texture and oak cabinets to boot. Soooo, I couldn't just paint the wall a glossy white, I had to cover it up with 4' X 8' dry erase panels. I also wanted to add a picture ledge all the way around for display.
BEFORE:
 |
AFTER:
 |
| My favorite part of this oh so elegent dining room is the air filter/conditioner grill smack dab in the middle of the wall and straight ahead for all who enters to see. The paneling does a pretty good job of hiding it though. |
BEFORE:

AFTER:
 |
| If you look close enough (don't), you'll see that the boards are not spaced evenly. Some are 12" apart and some are 15" apart! I did this to save myself the headache of cutting around the outlet and also to cover up the mistake I made after cutting the outlet box hole too big. I also wanted a 'board' in each corner. |
BEFORE:

AFTER:
 |
| The other little thing I did to save myself lots of time and cash was to use very thin pieces of wood for the batten portion. If I had used the suggested 1/4" thick batten (which look I actually prefer), I would have had to rip out my baseboards and used thicker wood so the batten wouldn't hang over the edge of the base. If I had to do it over, I would have followed the voices and done it the suggested way. |
 |
| I applied this stencil with the same color paint in a high gloss version (Home Depot added the gloss to the Behr paint for free) on this side only to discover that I don't love it and think it belongs in my grandma's dining room (if I had one). Still working on this... |
What does one do when one has extra material lying around and still has a few weeks before the nail gun owner comes a knockin'? That's right, they board and batten anything they can get their hands on. I still had about Dennis Prager podcasts to catch up on anyway.
THE HALLWAY:
 |
| This little wall greets those coming in directly from the garage door and was the spot where all the backpacks/lunch bags/shoes/other crap ended up. Now it's just the shoes that end up on the floor, even though the shoe basket is 6 inches away. |
OTHER SIDE OF HALLWAY:
 |
| I wanted to put a picture rail up here also but not only is this hallway narrow (I didn't want to constantly bump into the picures) but it's on the 'garage wall' so every time the garage door slams, I just knew stuff would be falling off the rail. |
Thursday
Laundry Room Before and After

BEFORE
(Dark and not all that happy)

AFTER
(doesn't this room exclaim, "Come in here and do laundry! You'll love being in here!" Maybe a wee bit exaggerated.)

My goal to rid this house of all honey-stained oak woodwork is slowly being realized one can of paint at a time. I used Annie Sloan's Paris Gray and mixed in a bit of Old White. I'm really happy with the way the cabinets turned out and don't mind the visible brush strokes (although in the kitchen I went with an oil based paint cause I didn't want to see strokes).
 Halfway finished!
  The girls at one of my favorite blogs, 'girls with good taste' came up with the brilliant idea of using contact paper for the stencil when making chevron stripes. Genius! The back of the paper has a grid on it and it was so.much.easier (and cheaper) than using a vinyl like I have in the past. I really wanted to use something bright and different then the rest of the house (where cool colors dominate) and this banana pepper yellow was the one.
  My intent was to put this 'be happy' vinyl on the refrigerator, but I decided it would be way more fun for us to try our hand at poetry with those little magnetic words.

 I commissioned my girls to create some watercolor paintings to fill the space above the cabinets. Not too shabby, right?
You are my Sunshine...One of my favorite songs my mom use to sing to us. I made the sign using the vinyl as a stencil. One of those projects I thought I could whip out in under an hour but it actually took me 3. Ugggg.
Subscribe to:
Posts (Atom)